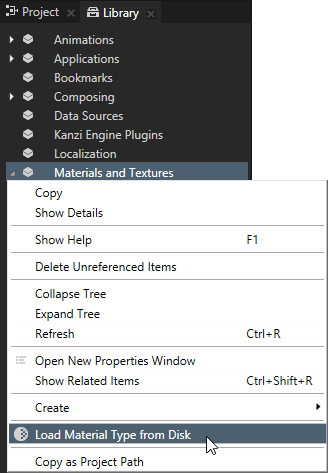
- In the Library right-click Materials and Textures and select Load Material Type From Disk.
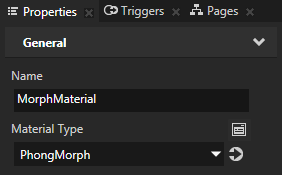
- Load the Phong material type and rename it to PhongMorph.
- In the Library > Materials and Textures > Material Types > PhongMorph open the vertex shader and replace
attribute vec3 kzPosition;
attribute vec3 kzNormal;
with
attribute vec3 kzMorphTarget0Position;
attribute vec3 kzMorphTarget1Position;
attribute vec3 kzMorphTarget0Normal;
attribute vec3 kzMorphTarget1Normal;
To morph between more than two meshes, add as many
kzMorphTargetPositionandkzMorphTargetNormalattributes as you have meshes between which you want to morph. - In the PhongMorph material type vertext shader add
uniform mediump float kzMorphWeights[2];
To morph between more than two meshes, set the
kzMorphWeightsto the number of meshes between which you want to morph. - In the PhongMorph material type vertext shader in the
main()function instead ofvec4 positionWorld = kzWorldMatrix * vec4(kzPosition.xyz, 1.0);
use
vec3 position = kzMorphTarget0Position * kzMorphWeights[0] + kzMorphTarget1Position * kzMorphWeights[1];
vec4 positionWorld = kzWorldMatrix * vec4(position.xyz, 1.0);
vec3 V = normalize(positionWorld.xyz - kzCameraPosition);
vec3 normal =
	normalize(
		(kzMorphTarget0Normal * kzMorphWeights[0]) +
		(kzMorphTarget1Normal * kzMorphWeights[1])
	);
To morph between more than two meshes, adjust the
kzMorphTargetPosition,kzMorphWeights, andkzMorphTargetNormalvalues accordingly. - In the PhongMorph material type vertext shader in the
main()function replacevec4 N = kzNormalMatrix * vec4(kzNormal, 1.0); vNormal = N.xyz; gl_Position = kzProjectionCameraWorldMatrix * vec4(kzPosition.xyz, 1.0);
with
vec4 N = kzNormalMatrix * vec4(kzNormal, 1.0);
vNormal = N.xyz;
gl_Position = kzProjectionCameraWorldMatrix * vec4(position.xyz, 1.0);
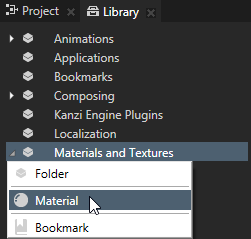
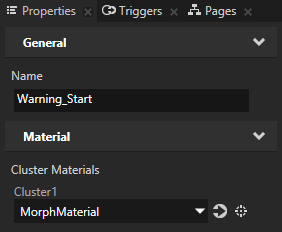
- In the Library press Alt and right-click Materials and Textures, and select Material.
- In the Properties set the Material Type property to PhongMorph.
- (Optional) Adjust the material properties. For example, to change the base color of the material, adjust the Ambient Color property.
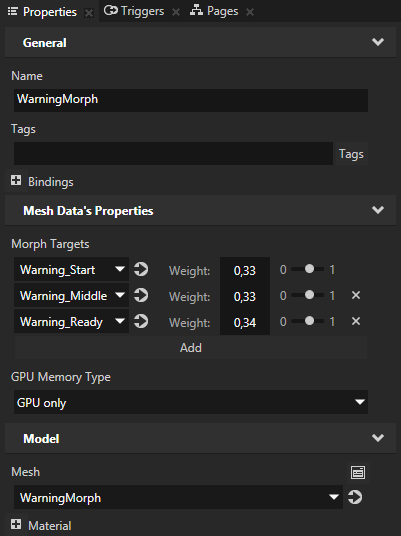
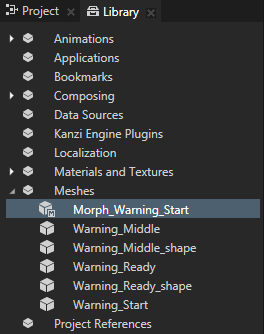
After Kanzi Studio imports the 3D model to your project, it creates the meshes from the 3D model, and a Morph resource that uses the imported meshes. You can find these resources in the Library > Meshes.
Note If Kanzi Studio imports extra morph target shapes without polygon data, in the Library > Meshes select the Morph and in the Properties set the Morph Targets property to point to the meshes that include the polygon data.
- In the Project press Alt and right-click the node where you want to place the morph and select Model.
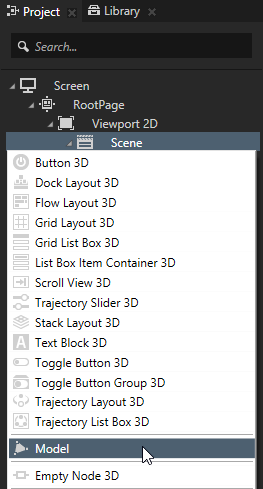
- In the Properties set the Mesh property to the Morph resource you want to use.
- To adjust the level of morphing in the Library > Meshes select the Morph resource and in the Properties in the Morph Targets property adjust the Weight property to control the shape of the morph. For example, to animate the morphing, make the animation target the <MorphWeight>[n] property of the Morph resource, where n is the mesh in the Morph the weight of which you want to change.